https://github.com/mypaint/mypaint/pull/853
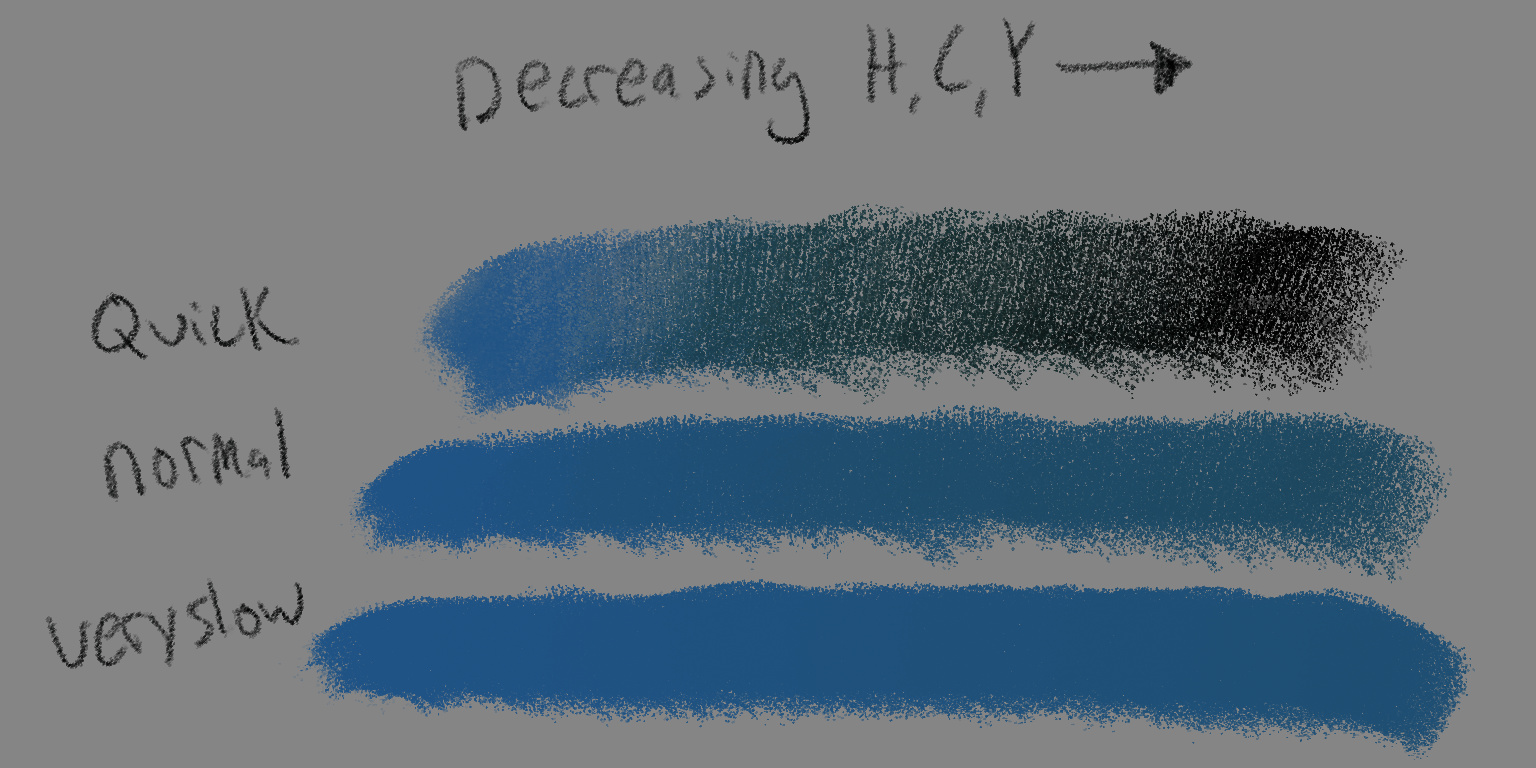
Changed the color adjuster step-size to change based on how fast you press the buttons. You can get very gradual gradients by waiting a bit more between each adjustment. It can take some practice to get used to it:
This has been marked a TODO item for a long time, so I took a stab at it. We have the HCY wheel and the HCY component sliders, but the real-time adjusters are currently HSV, while HCY might be more useful for most artists.
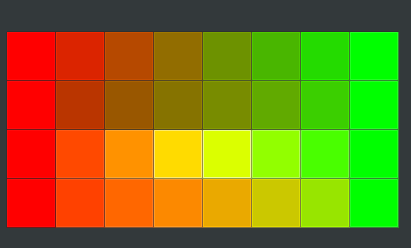
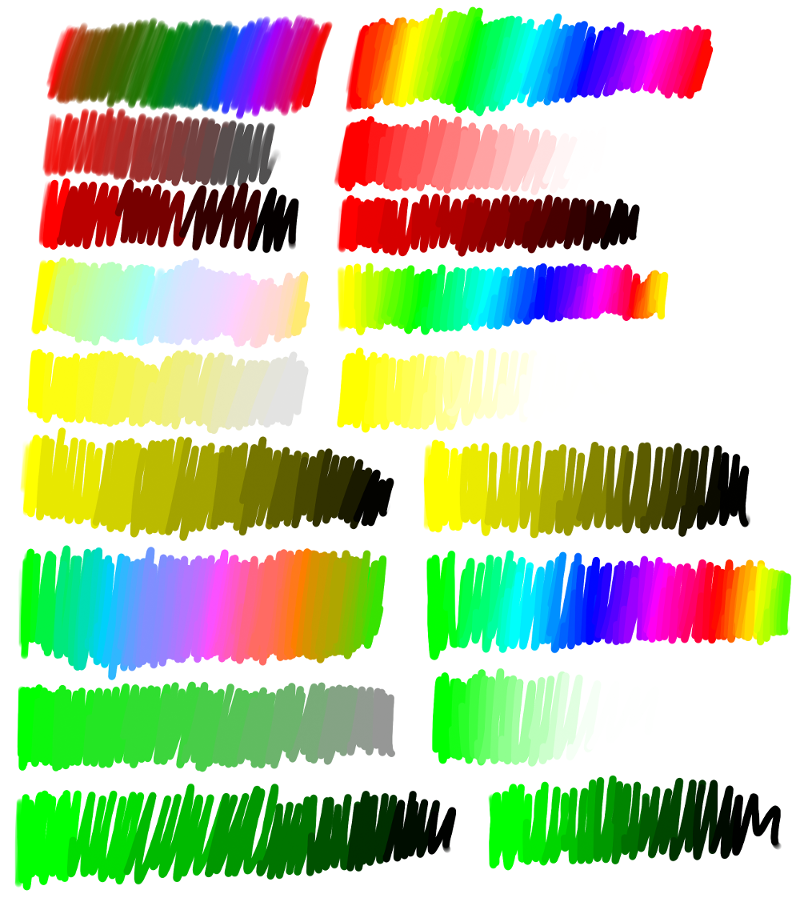
HCY gives you a much more useful and natural way to shift your brush color properites. I think it follows the intent of the traditional artist more closely. According to Wikipedia “Colors of the same hue and lightness, but of different saturation, are called tones.” So when we adjust saturation (C) with HCY, it seems we are getting tones. This is pretty cool, as it doesn’t seem possible to get tones from HSV adjusters. Likewise, with HCY, we can get tints and shades by adjusting the Lightness (Y), which is also not possible with HSV (rather, you can only get shades). In the demo below I failed to show that with HCY the Y scale goes from White to Black (all tints and shades), whereas HSV lightness is much more narrow (only Shades)

Left column is HCY, Right column is HSV
Hue Shift
Chroma/Saturation shift
Luma/Value shift
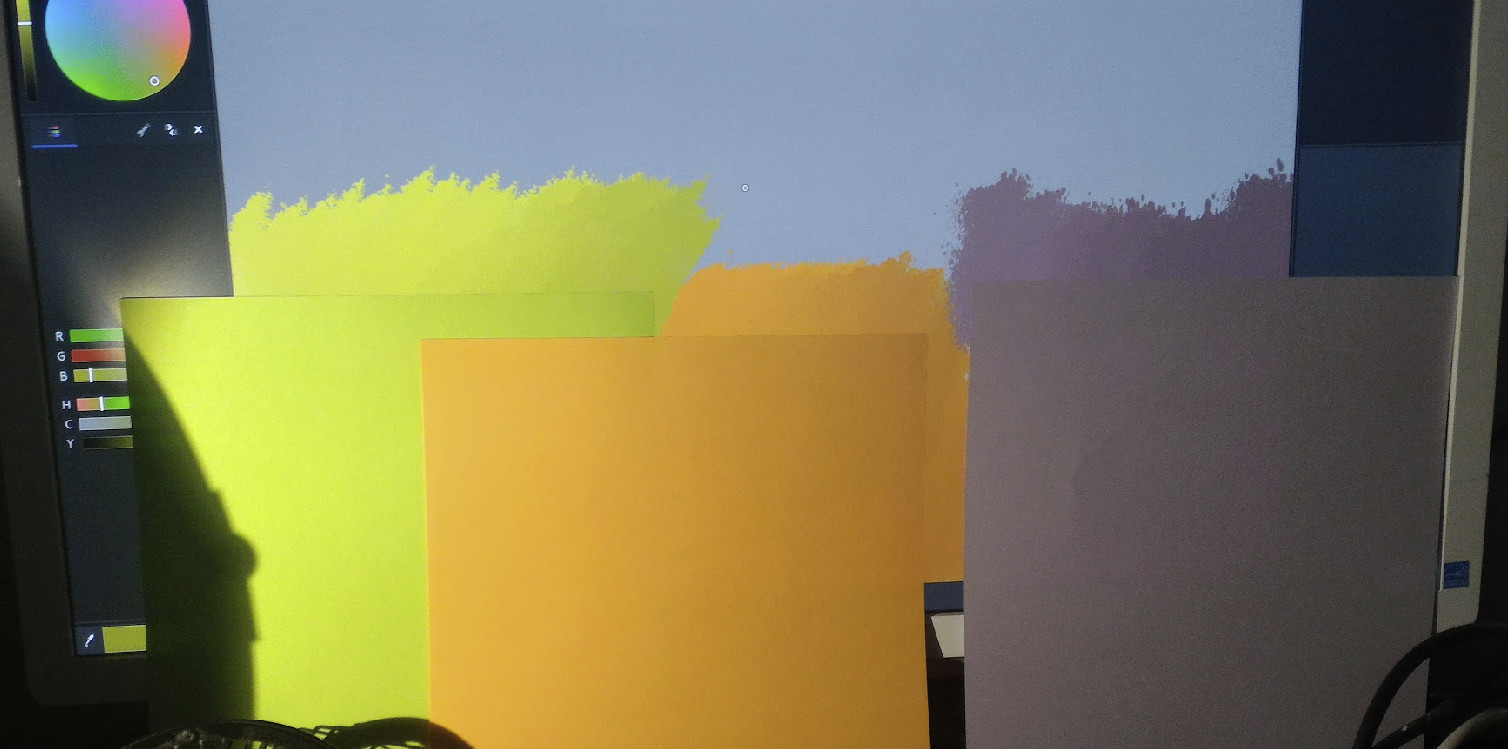
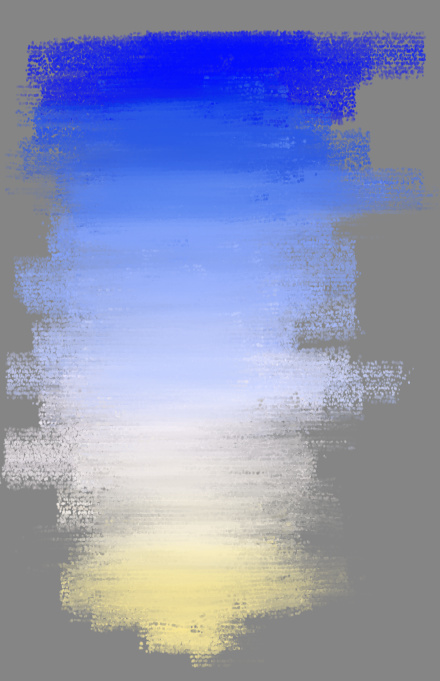
I’m also experimenting with splashing the new adjusted color up on the screen as a color swatch. This could make it easier to choose colors since the new color will appear wherever you want, so you can see it in context with the colors on the canvas:

Here’s a better demo that tries to show how useful it can be to splash the adjusted color onto the canvas as an overlay: